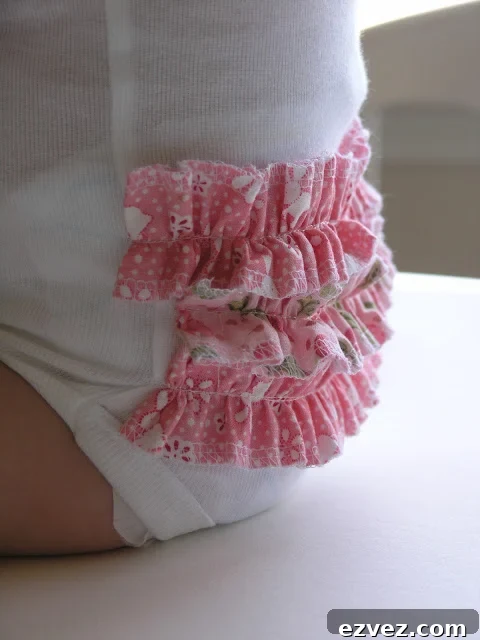
When I first saw Megan’s ruffle bumsie, I immediately wanted to try making one myself. I grabbed a few white onesies and some leftover apron fabric and set out to practice a neat, even ruffle technique. I followed the basic steps from a ruffle-bumsie tutorial I had read earlier and adapted them to the materials I had on hand. I cut three strips of fabric, each 1.5 inches wide, and finished the edges with my serger. Then I used my regular sewing machine, lengthened the stitch and increased the tension until the fabric gathered nicely. Sewing straight down the center of each strip created nicely even ruffles that I then pinned along the bottom of the onesie and stitched in place.
To personalize the front, I cut out an “A” for Addie from a coordinating alphabet-print fabric. I used a lightweight fusible web to bond the letter to the onesie, following the product instructions for ironing. After the letter was fused, I added a few small rolled fabric flowers and two leaves to the lower edge of the “A” for a sweet, finished look. Finally, I stitched around the letter and leaves with a straight stitch, and stitched over the tops of the little flowers to secure them to the fabric.
The whole project was relaxing; it took me about two hours while I watched TV and chatted. Sewing small projects like this is a good way to use fabric scraps, practice gathering and applique skills, and create a special handmade item quickly. Addie seemed pleased with her new outfit — she didn’t fuss while I took photos, which I took as a vote of approval. Or maybe she was occupied with a favorite toy; either way, it was an enjoyable afternoon craft.
A few practical notes and improvements I plan for next time:
1. When pinning the ruffle strips in place, I’ll try stretching the bottom area of the onesie a little horizontally so the gathers have more room to settle. On this first attempt I had to be careful when dressing Addie to avoid stressing the stitches, so allowing a bit more fabric ease will keep the seams from pulling when the onesie is worn.
2. I’ll add more rows of ruffles on future versions. Three rows look charming, but when Addie crawled around I thought a few more tiers would give a fuller, more pronounced ruffle on the bumsie. Adding two or three additional rows will create that fuller effect and cover more of the back for an even cuter look.
3. The alphabet fabric applique turned out better than I expected, and I want to use more of that print. Choosing a coordinating fabric for the letter made the whole piece feel cohesive. For durability, I stitched around the applique and over the flowers rather than relying solely on the fusible web, which gives the design more longevity through wash and wear.
4. Test your settings on scrap fabric before sewing the real piece. I increased stitch length and tension to achieve the gathers, and that combination worked well on my machine, but different fabrics or machines will need different adjustments. Testing on a scrap allows you to fine-tune stitch length and tension so the ruffles look even and the seams hold up.
5. Consider finishing the raw edges of the ruffle strips before gathering. I used my serger to prevent fraying, which saved time and gave a clean edge. If you don’t have a serger, a narrow zigzag or a French seam on scrap fabric can also work to keep the ruffles neat after repeated washing.
Overall, this was a quick and satisfying project that made a simple onesie into something special. It’s a great way to use small fabric remnants, practice gathering and applique, and produce a cute handmade garment in an afternoon. I’m already thinking of the next color combination and whether to try different flower styles or a contrasting thread color for the topstitching.